🌟 Why These Brownies Are Legendary
We’ve all had gourmet brownies.
With sea salt. Swirled caramel. Espresso shots.
But this?
This is real-deal comfort baking.
Here’s what makes Lunchroom Ladies Brownies so special:
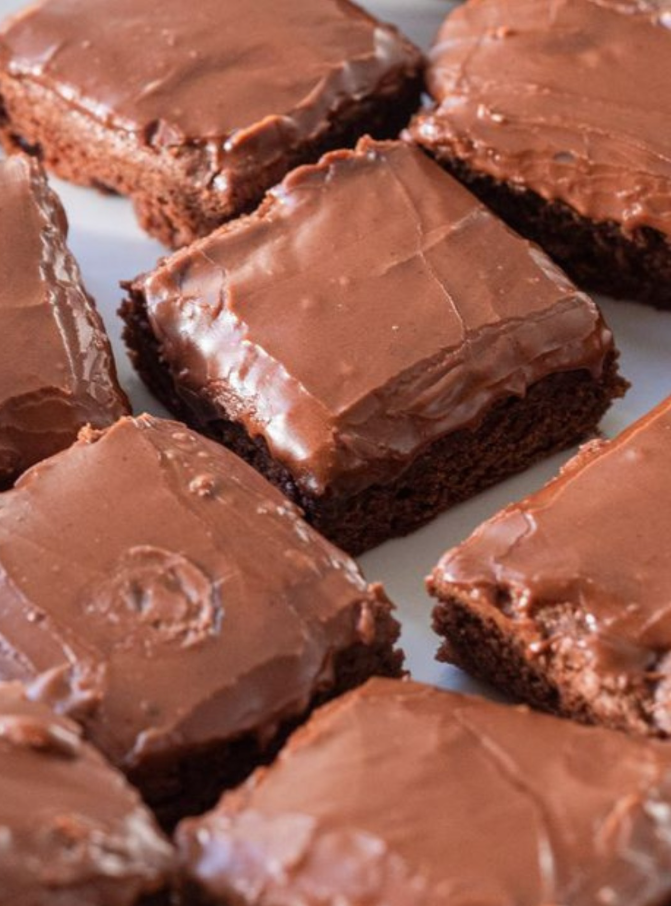
✅ Ultra-fudgy texture —thanks to melted butter and extra sugar
✅ Simple, no-nonsense ingredients —no buttermilk, oil, or sour cream needed
✅ Thick chocolate icing —pours over warm brownies and sets into a snappable shell
✅ School-lunch nostalgia —they taste like recess, report cards, and sharing with your best friend
They’re not trying to be fancy.
They’re trying to be delicious, dependable, and deeply satisfying.
And they succeed—every time.
🛒 What You’ll Need: Pantry Staples, Maximum Joy
Grab these cozy staples—you probably already have them:
For the Brownies:
1 cup (2 sticks / 226g) butter, melted
2 cups (400g) granulated sugar
4 large eggs
4 tsp vanilla extract (yes, really—it adds depth!)
1 cup (80g) unsweetened cocoa powder (not Dutch-process)
2 cups (240g) all-purpose flour
Pinch of salt (optional, but balances sweetness)
For the Chocolate Icing:
¼ cup (½ stick / 56g) butter, softened
¼ cup (60ml) whole milk (or half-and-half for richness)
¼ cup (20g) unsweetened cocoa powder
3 cups (360g) powdered sugar, sifted
That’s it.
No leavener. No nuts. No mixer required.
Just real food, mixed into magic.
🔥 How to Make Them: Step-by-Step, Soul-Warmingly
Let’s bake this like we’re honoring a classic—one thick spoonful at a time.
Step 1: Preheat & Prep
Preheat oven to 350°F (175°C).
Grease a 9x13-inch baking dish and line with parchment paper or foil, leaving overhang for easy lift-out.
Step 2: Mix the Wet Ingredients
In a large bowl:
Whisk together melted butter and granulated sugar until smooth.
Add eggs one at a time, mixing well after each.
Stir in vanilla extract.
👉 Batter will look grainy at first—keep stirring. It comes together.
Step 3: Add Dry Ingredients
Sift in cocoa powder and flour (and salt, if using).
Stir gently with a spatula until just combined.
⚠️ Do NOT overmix! Overmixing = tough brownies.
Batter will be thick, glossy, and fudge-like—that’s perfect.
Step 4: Bake to Fudgy Perfection
Pour batter into prepared pan.
Smooth the top as best you can (it’s okay if it’s uneven).
Bake 20–25 minutes, until a toothpick comes out with a few moist crumbs (not wet batter).
💡 Pro tip: Slightly underbake—these brownies firm up as they cool and stay fudgy longer.
Step 5: Make the Icing While Warm
As soon as brownies come out:
Let cool 10–15 minutes (still very warm—this helps the icing set evenly).
In a bowl, mix softened butter, milk, cocoa powder, and powdered sugar until smooth and pourable.
Step 6: Ice & Cool
Pour icing over warm brownies.
Use a spatula to spread gently—it will sink slightly and create that classic cafeteria sheen.
Let cool completely before slicing (~1–2 hours).
For clean cuts:
🔪 Use a sharp knife dipped in hot water and wiped dry between slices.
💡 Pro Tips for Next-Level Brownies
🍫 Use natural cocoa powder —it gives that classic “lunchroom” flavor (Dutch-process is smoother but less tangy).
🧈 Room-temp eggs blend better —prevents clumping.
🕒 Don’t skip the warm icing step —cool brownies won’t absorb the glaze the same way.
🍪 Want chewier edges? Bake in an 8x8 pan for thicker, fudgier results.
🧊 Freeze unfrosted: Wrap tightly, freeze up to 2 months. Thaw, warm slightly, then ice.
🍎 Serve with milk —because some traditions never change.
🍽️ When to Serve These Golden Gems
🎒 Back-to-school season (hello, PTA bake sale!)
🍪 Afternoon snack with a glass of cold milk
🫶 To someone who says, “I miss homemade brownies” —watch their face light up
🎉 Birthday parties where you want everyone to feel like a kid again
Because sometimes, the best desserts aren’t about being trendy.
They’re about being timeless.
❤️ Final Thought: Recipes Are More Than Instructions—They’re Memory Keepers
This isn’t just a brownie.
It’s a taste of childhood.
Of lunch trays, giggles, and sharing your last bite with a friend.
And now, you can recreate that feeling—anytime you need a little sweetness, simplicity, and soul.
So go ahead.
Make a batch.
Cut them into squares.
Serve them on a paper plate.
And let yourself remember.